+ Trả lời bài viết
Trang 2 của 4 Đầu tiênĐầu tiên 1 2 3 4 CuốiCuối
Kết quả 11 tới 20 của 34

Hybrid View

  1. #1
    Thành viên danh dự TuấnPhát_GSM's Avatar
    Ngày tham gia
    Jan 2009
    Bài viết
    1,788
    Cám ơn !!!
    117
    Thanked 452 Times in 322 Posts

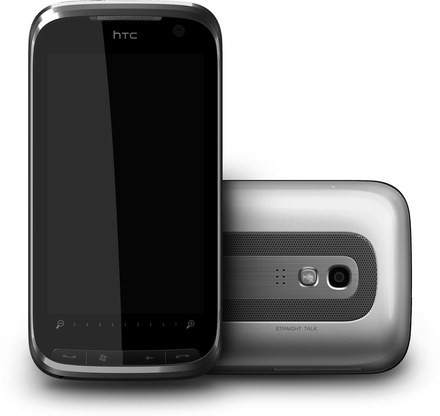
    Mặc định HTC Touch 2 Rhodium 6.5 debrand & upgrade success fully


    Hard-SPL Release Time!!!!

    1) download newest Hard-SPL package from Rhodium-HardSPL_V2_00R3_185HSPL.zip attachment, extract to an empty folder.
    2) you must Have Phone Synced with PC in Windows Mobile!!! I mean it has to be connected to activesync or WMDC via USB cable. and it must not be in Flight/Airplane mode (i.e. radio should be on).
    3) NEW: internet access is required as the program checks online for updates and license.
    4) run Rhodium-HardSPL_V2_00R3.exe on PC, make sure it's launched from a local drive (not through network drive, etc.). XP requires Admin logon, and Vista/Windows 7 will automatically prompt to allow it to run in Admin mode, allow it please. if you get an antivirus warning, please ignore it, it contains no harmful code (just used a packer to compress it).
    5) follow steps as prompted in the Hard-SPL program. if this is the first run of Hard-SPL on a device after hard reset, you must select Automatic flash mode (the first button in Welcome screen).
    notes: you should usually go for Automatic flash mode; the Manual flash option is only to be used as noted below and you must only attempt the Manual mode option if Automatic flash mode or SSPL-Manual.exe already put device in black screen. any other errors triggered while running in Autoflash mode will have to be fixed as instructed in the error message.
    6) it will ask you to wait while it prepares for the flashing, press OK.
    7) now it should go through without any error messages, if one does pop up, then please follow the instructions included in the error text. if no specific instruction is shown, then ask for help in the thread, but this should not ever occur (as this means a really fatal error occurred).
    8) at this point the device did hopefully went to a black screen (reporting version as 1.10.C-SSPL only using "info 7" in mtty), this is the SSPL version, which is temporary. then RUU will instantly launch.
    9) some notes: when RUU says it will hard reset, do not worry, it is not going to do that. also when it says the flash will take 10 minutes, ignore that, it will only take a minute or so.
    10) SPL flashes, device automatically reboots, job done.
    11) to confirm you got it installed, go into bootloader mode (tricolour screen!) and verify the screen shows 0.85.OliNex, which is the Hard-SPL version.


    HERE 6.5 download


    NOTE: you will not see the SPL version during normal boot, that is the OS version, not SPL!
    to enter SPL to check version, do a soft reset while holding the "volume down" key on the left side of the device. keep holding the volume down key until you see tricolour screen which is the bootloader mode, then release it.

    NOTE 2: this is unsigned Hard-SPL. no limitations on flashing ROMs (except of course some Radio roms). also, this has overwrite protection against HTC RUU's overwriting HSPL with a stock one, so if someone needs to revert to stock SPL for warranty reasons, a stock SPL downgrade package is posted here below. use this relocker *only* if you need to return the phone for warranty, and only use it as last step - after reflashing stock OS and radio. see steps at the end of this post about how to reflash stock SPL.

    NOTE 3: anyone having USB problems with the device after it entered SSPL mode, please copy SSPL-Manual-Rhodium.exe from SSPL-Manual-Rhodiumxxx.zip attachment in this post, copy it to the device and run it. then once the screen has gone black, run the Hard-SPL package on the PC and you must select Manual flash option. *important*: make sure that the USB cable is plugged in and device is synced to Windows Mobile even if doing manual method.

    NOTE 4: do not use this RUU for anything other than SPL flashing (i.e. hardspl or stock spl restore)!!! nothing other than SPL's made by Olinex team (using OliNex custom cert, which is not public) will flash to make SSPL more secure. if you want to flash some other rom, then use shipped RUU or rhodium customRUU if you need to flash cooked ROM.

    NOTE 5: for developers asking: Hard-SPL is not based on MFG SPL, as it can strictly be used for development and hacking, contact cmonex in PM if you need that one.

    NOTE 6: supported OS versions: both 32-bit and 64-bit XP, Vista, Windows 7RC and later. win2000 was untested, and pre-RC win7 (lower than build 7100) is explicitly not supported. also, the program may be unstable or not work on Virtual systems, so it's recommended to try outside Virtual OS softwares. also, version verify: if Hard-SPL package says V200R in first Welcome dialog title (and version 2.00 in About box), it is the latest version, not some crappy beta/old version.


    Troubleshooting and Step by Step on reflashing stock SPL are in next post below!


    credits

    first, "OliNex" is a team which means: cmonex + Olipro
    Olipro -> concept of EXE program that runs on the PC, Hard-SPL concept, server-side license code and maintaining the licenses.
    cmonex -> HSPL package on PC, SSPL loader for windows mobile and SSPL binary. Hard-SPL binary. (SSPL loader: partially based on haret and old pof&Olipro jumpspl code),


    BR

    Download: Rhodium-HardSPL_V2_00R3.rar

  2. #2
    Thành viên danh dự TuấnPhát_GSM's Avatar
    Ngày tham gia
    Jan 2009
    Bài viết
    1,788
    Cám ơn !!!
    117
    Thanked 452 Times in 322 Posts

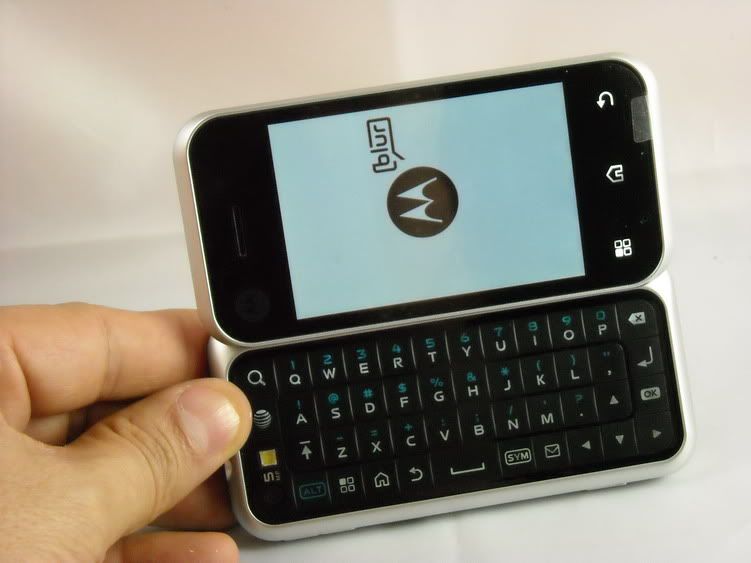
    Mặc định Motorola MB300 Factory Reset

    The Reset procedure for Moto BLUR (MB300) differs from other Motorola ANDROID Models.


    1. Power off phone.
    2. Hold camera button and power on phone at the same time.
    3. Release the camera button when prompted to.
    4. You will see a message screen telling you to press the up or down volume button
    5. Press and HOLD the down volume key (ignore message 'Volume Up Key Pressed')
    6. When triangle and phone screen appears
    7. Press on the screen just above the back key
    8. You will now see the "Motorola system recovery" menu
    At this point you will have three choices:

    1. reboot system now [Menu+Back]
    2. apply ssdcrad:update.zip [Alt+S]
    3. wipedata/factory reset [Alt+W]
    You can simply tap an item to select it.

    At the bottom of the screen you can select OK to apply your choice from the menu.

    There is also an opportunity to select Hide on the bottom left, I don't know what that does (I tried it and nothing happened).

    Selecting Wipe data/factory reset and tapping Ok and the screen changes to a box and a phone (Get it - out of the box) and you see what is happening on the phone.
    pick 2
    -- Wiping data...
    Formatting DATA:...
    Formatting CACHE:...
    Data Wipe Complete.

    Press Menu+Back to reboot

    pressing Menu+Back did nothing for me so I tapped 'reboot system now' on the menu and Ok.

    The phone restarted and took me through the setup prompts.

  3. #3
    Thành viên mới bichthuymobile's Avatar
    Ngày tham gia
    Jul 2007
    Bài viết
    28
    Cám ơn !!!
    10
    Thanked 1 Time in 1 Post

    Mặc định

    cho mình hỏi HTC Smart F3188 co tiếng việt không nếu ai có thì cho mình xin rom tiếng việt
    Last edited by bichthuymobile; 14-02-2011 at 22:33.

  4. #4
    Thành viên danh dự TuấnPhát_GSM's Avatar
    Ngày tham gia
    Jan 2009
    Bài viết
    1,788
    Cám ơn !!!
    117
    Thanked 452 Times in 322 Posts

    Mặc định How To Downgrade Htc Hero Hboot To 1.76.004

    How To Downgrade Htc Hero Hboot To 1.76.004

    First Of All You Need To Update Or Downgrade Your Htc Hero With This Rom

    You Need Make Gold Card Must For 100% Result

    For Unlimited Gold Card Method Click Here

    Quick Guide How to Downgrade Hboot:

    1. On your phone, goto Settings, Applications, and make sure Unknown source is checked ON.

    2. On your phone, goto Settings, SD card and phone storage, and click Unmount SD card.

    3. Then click Format SD card (it should automatically remount after this).

    4. Plug the phone into the compuer via USB, then pull down the notification bar and click on the SD card notification. Then click mount.

    5. Download this APK and recovery image & hboot zip from Support
    and save it to your computer:

    6. Save both the recovery.img, flashrec.apk & Update.zip to your computer, then copy them both to your SD card
    (do not put them inside any folders on the SD card, just put them in the root of the SD card itself).

    7. Unplug the phone from the computer once they are downloaded to the SD card.

    8. Goto the Market and download Linda File Manager or any file manager program if you do not already have one.

    9. Open the file manager and goto SD Card and then find the flashrec.apk file and click on it.
    If asked, tell it to use Package Installer to open it. It should automatically install the apk.

    10. Open the FlashRec program and click on Backup Recovery Image and wait for it to finish.

    11. Once done, click on the empty text box in the FlashRec program and type:
    /sdcard/recovery.img
    Then click on the Flash Custom Recovery Image button and wait for it to finish.

    12. Turn off the phone and turn it on into Recovery mode by holding down Home and Power to turn it on
    (keep holding until the recovery screen comes up has a bunch of text on a black background).
    As long as that screen comes up, you have done it correctly and can now go and load other ROM/hboot/whatever

    13. Now Put update.zip in sd card
    & in recovery mode select option 'update any zip from sd card'

    14. Now select update.zip & press home button to confirm.

    15.now it will ask press home & back button same time for completion the process

    You Done Now You Can Read Code From Micro Box


    Br
    ..::Bilal Shah::..

  5. #5
    Thành viên danh dự TuấnPhát_GSM's Avatar
    Ngày tham gia
    Jan 2009
    Bài viết
    1,788
    Cám ơn !!!
    117
    Thanked 452 Times in 322 Posts

    Mặc định HTC Smart F3188 hard reset


    - Press & hold volume up+down
    - Press Power on
    - Press Volume down to hard reset
    - Press other button to cancel

  6. ( TuấnPhát_GSM ) được 1 thành viên cảm ơn vì bài viết hữu ích!

    van.iphone (10-08-2012)

  7. #6
    Thành viên danh dự TuấnPhát_GSM's Avatar
    Ngày tham gia
    Jan 2009
    Bài viết
    1,788
    Cám ơn !!!
    117
    Thanked 452 Times in 322 Posts

    Mặc định HTC Snap if unlock code not accepting how to hard reset phone..Sol

    HTC Snap if unlock code not accepting how to hard reset phone..Solution is here.Sometime phone keypad is not working when we write down unlock code in HTC Snap,For this kind of problem u hv to Hard Rest ur phone.


  8. #7
    Thành viên danh dự TuấnPhát_GSM's Avatar
    Ngày tham gia
    Jan 2009
    Bài viết
    1,788
    Cám ơn !!!
    117
    Thanked 452 Times in 322 Posts

    Mặc định Hard reset Motorola Droid 3


    Hello, everyone. This is in verizon-cellphones.org. We have posted several topics about your new Motorola Droid 3 cellphone recently. You can download the PDF user manual, usb driver that supports you to use your cellphone. As well, how to extend your Motorola Droid 3 cellphone battery life has been available for you. Now, this page you are viewing is in relation to how to hard reset your Motorola Droid 3 cellphone. Is this what you are searching? Read to check out whether it is helpful or not.

    Before you start, you should know these:

    Factory Data Reset is a tool used to remove everything that you have imported, added or installed on the device. If you confirm to [B]hard reset[/B] your Motorola Droid 3 cellphone, everythingwill be deleted. So you are pretty recommanded to backup the important data and information.

    Factory Data Reset
    * From the screen of your phone, press the Menu button
    * Tap Settings.
    * Scroll down and tap Privacy
    * Tap Factory Data Reset
    * Check Erase internal storage if you would like to erase all the data on the phone internal storage such as applications, music, movies or photos.
    * Tap Reset Phone
    If your cellphone has been so awful that you have no approach to hard reset it using the above way, try this external keys.
    What we have to emphasize:

    We recommend you use the above Factory Data Reset. Making a mistake using the method below may have very bad consequences.
    1. Power the device off.
    Press the Power button then select Power off.
    If the device doesn’t respond to input, remove and replace the battery
    2. Slide the keyboard open.
    3. Press and hold the Power button+X key simultaneuously until the Recovery screen (exclamation point with an android figure) appears.
    4. Slide keyboard closed then simultaneuously press the volume up+down keys.
    5. Press Volume down to select wipe data/factory reset the press the Power button.
    Utilize the Volume keys (up / down) to select.
    6. Press Volume down to select Yes — delete all user data then press the Power button.
    Factory reset process may take several moments to complete.
    7. Ensure reboot system now is selected then press the Power button.
    Reboot process may take several minutes to complete.

  9. #8
    Thành viên danh dự TuấnPhát_GSM's Avatar
    Ngày tham gia
    Jan 2009
    Bài viết
    1,788
    Cám ơn !!!
    117
    Thanked 452 Times in 322 Posts

    Mặc định Atrix 4G MB860 Firmwares


  10. #9
    Thành viên danh dự TuấnPhát_GSM's Avatar
    Ngày tham gia
    Jan 2009
    Bài viết
    1,788
    Cám ơn !!!
    117
    Thanked 452 Times in 322 Posts

    Mặc định CLIQ 2™ MB611 Hard Reset

    CLIQ 2™ MB611 Hard Reset


    1- Nhấn và giữ phím X + Power. Cho tới khi hiện biểu tượng tam giá chấm than và hình Android màu xanh nhỏ đứng dưới tam giác.
    2- Sau đó tiếp tục nhấn phím @ máy sẽ xuất hiện:
    * reboot system nơ
    * apply sdcard:update.zip
    * wipe data/factory reset
    * wipe cach partition


    Chúng ta nhấn Volum Down để chọn dòng wipe data/factory reset rồi nhấn phím OK.
    Máy sẽ hiện bảng thông báo:

    Confirm wipe of all user data?
    THIS CAN NOT BE UNDONE.
    No
    Yes -- delete alls user data
    No


    Chúng ta chọn dòng Yes -- delete alls user data rồi nhấn Enter máy sẽ bắt đầu xóa data.
    Sau khi Hard Reset chúng ta chọn Reboot system now để khởi động máy lại là xong.

    Quá trình Hard Reset hoàn tất.

  11. #10
    Thành viên danh dự TuấnPhát_GSM's Avatar
    Ngày tham gia
    Jan 2009
    Bài viết
    1,788
    Cám ơn !!!
    117
    Thanked 452 Times in 322 Posts

    Mặc định Flash Motorola XT862 (Motorola Droid 3)


    Motorola XT862 (Motorola Droid 3)

    1: Download the 5.6.890 SBF file HERE
    2: Download RSDLite 5.5 HERE
    3: Extract the contents of the SBF file to a folder on your computer
    4: Install RSDLite
    5: Boot the Droid 3 into bootloader by holding both Vol+ & Vol- at the same time when powering the phone on
    6: Select "AP Fastboot" and press Vol+ to select it
    7: Select the XML from the extracted SBF file in RSDLite
    8: Connect the phone, and when it says "Connected", hit "Start"
    9: Wait for the phone to finish flashing, and booting (it will reboot a couple times, leave it alone, its supposed to!)
    10: Install and run Petes Motorola Root Tools. Download it HERE
    11: Follow the instructions in the app to root your phone
    12: Once rooted, use Koush's Droid 3 Bootstrap app to install CWM Recovery
    13: BEFORE you use the bootstrap, mount "USB Mass Storage" on your phone, and copy my ROM to the INTERNAL STORAGE (drive label is "MOT")
    14: Now open the bootstrap app, click the top button, labeled "Bootstrap Recovery". Then, once successful, click the bottom button labeled "Reboot Recovery", to go into recovery
    15: Go to "install zip from sdcard", then "choose zip from internal sdcard", then select my ROM's zip file
    16: After it installs, back out and reboot the phone
    17: YOU HAVE DONE IT! CONGRATS ON YOU NEW STEEL DROID INSTALL!

+ Trả lời bài viết

Thread Information

Users Browsing this Thread

Hiện có 6 người đang xem bài này . Bao gồm : 0 thành viên và 6 khách


Similar Threads

  1. Hướng dẫn chạy firmware cho Nokia Lumia Windows Phone (800, 710,....) qua Navifirm.
    By Lính Khang in forum Phần mềm và các mã lệnh cho Nokia
    Trả lời: 34
    Bài viết cuối: 20-01-2014, 15:52
  2. Phần mềm sao lưu tin nhắn cho Windows Mobile
    By TuấnPhát_GSM in forum HTC Winphone
    Trả lời: 0
    Bài viết cuối: 28-09-2010, 21:15
  3. Windows Mobile V128A
    By Rap_Gsm in forum CPF-BOX Ⅱ
    Trả lời: 0
    Bài viết cuối: 17-03-2009, 18:26
  4. HN-Iphone -- windows mobile pocket PC 6.0
    By tram89 in forum QUẢNG CÁO VÀ MUA BÁN
    Trả lời: 0
    Bài viết cuối: 28-10-2008, 23:00
  5. J.A.F Windows Mobile
    By saigonmobile in forum QUẢNG CÁO VÀ MUA BÁN
    Trả lời: 0
    Bài viết cuối: 30-03-2006, 09:18

Quyền viết bài

  • Bạn không thể tạo chủ đề mới
  • Bạn không thể gửi trả lời
  • Bạn không thể gửi đính kèm
  • Bạn không thể sửa bài viết của bạn
Lên đầu trang
thiet bi sua chua slim sim, heicard, sim ghep Firmware android giải pháp nhà thông minh